You can assign one or more members of your team to a project. Team members assigned to a project have write access to all mappings under it. Ensure that the roles assigned to the users have the required permissions.
To assign users, follow these steps:
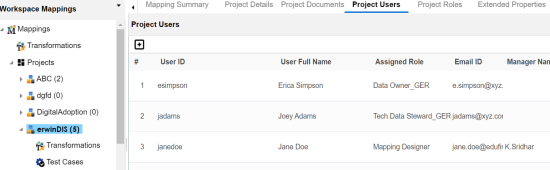
- In the Workspace Mappings pane, click a project.
- Click the Project Users tab.
- Click
 .
. - Select user IDs under User ID list-box and move them to Assigned Users list-box using the arrows (
 or
or  ). Similarly, to change existing user assignment, select user IDs under Assigned Users list-box and move them back to User ID list-box using the arrows (
 or
or  ).
). - Click
 .
.
The Project Users page appears.
The Assign Project Users page appears.

You cannot assign users with Administrator role to projects.
The selected users are assigned to the project.

Use the following options to work on the project users list:
Use this option to view project user details, such as telephone number, company, and the assigned responsibility.
Use this option to update project user details, such as assigned role and assigned responsibility.
Use this option to remove a user from the project users list.
|
|
|
Copyright © 2021 erwin, Inc. All rights reserved. Copyright © 2021 Quest Software Inc. All rights reserved. All trademarks, trade names, service marks, and logos referenced herein belong to their respective companies. |